
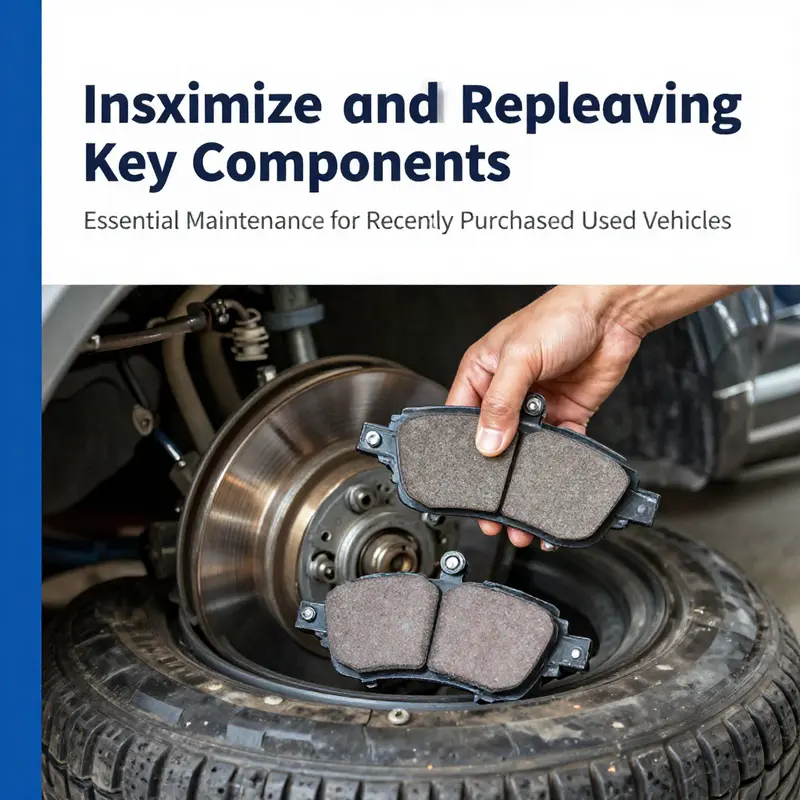
Purchasing a used vehicle can be a smart business move, but it demands diligence to ensure long-term reliability and safety. For business owners, a well-maintained vehicle not only enhances operational efficiency but also safeguards your investment. This article delineates essential maintenance tasks tailored for recently purchased used vehicles. Each chapter highlights specific maintenance areas—from fluid replacement to electrical checks—providing a comprehensive roadmap that ensures your fleet operates optimally and lasts longer.
Reboot Your Ride: Essential Fluid Replacements After Buying a Used Vehicle
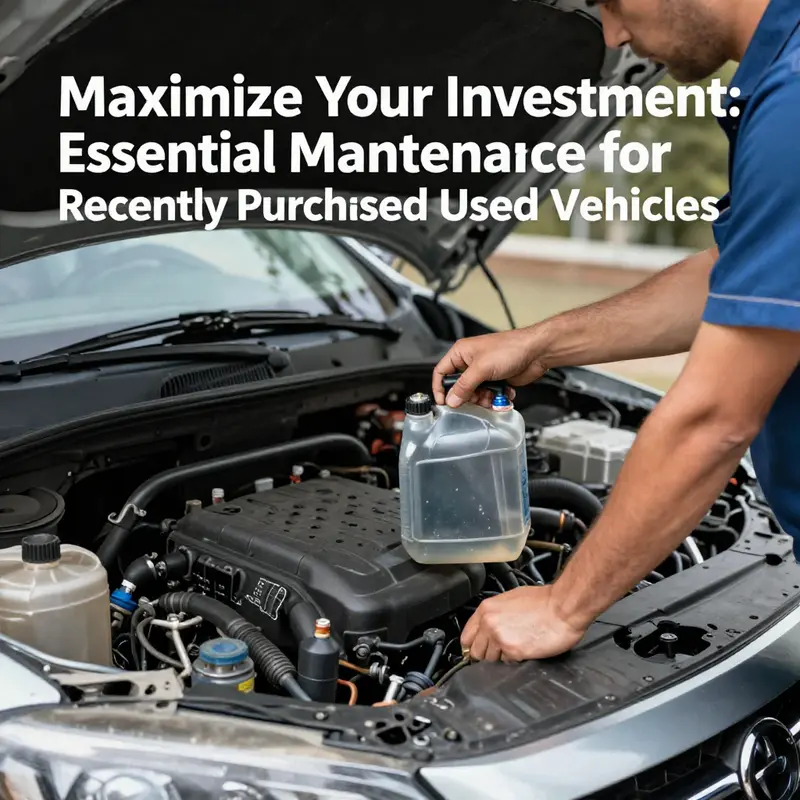
When you bring a used car home, you’re not just inheriting a set of miles. You’re inheriting a fluid history. The fluids in a vehicle are more than just lubricants or coolants; they are the lifeblood that keeps metal from grinding itself into silence, and they carry information about how the car has been cared for in the past. A thoughtful approach to replacing and topping off these fluids after a purchase can prevent future breakdowns, protect components, and extend the life of the vehicle. It’s a practical ritual with outsized rewards, especially when you start from a clean slate and build a maintenance baseline for the months and miles ahead. In this chapter, the focus is on the fluid replacements that matter most for a recently purchased used vehicle, what signals you should watch for, and how to integrate these tasks into a coherent, affordable plan that respects the car’s design and its history.
Engine oil and oil filter form the first line in this maintenance effort. Fresh oil reduces friction, carries away heat, and helps seal tiny gaps that can widen with time. If the vehicle has uncertain service history, or you simply don’t know what grade of oil was last used, default to the manufacturer’s recommended viscosity. That information is usually found in the owner’s manual or indicated on the oil fill cap. If consumption appears higher than expected or the engine sounds louder at idle, you might conservatively consider a slightly higher viscosity as a short-term safeguard, but you should not deviate from the manufacturer’s guidance unless advised by a trusted technician. A new filter is essential because it traps particles that can otherwise circulate and wear bearings. Replacing the oil and filter is a straightforward first move after purchase, and it sends a clear message: you’re establishing a clean baseline for everything that follows.
Brake fluid is another critical fluid that deserves prompt attention. It remains hygroscopic, meaning it absorbs moisture from the air over time. As water content climbs, the fluid’s boiling point drops, which can reduce braking performance during heavy use or in hot conditions. The practical takeaway is simple: plan to replace brake fluid every couple of years or roughly every 40,000 kilometers, depending on the vehicle and the climate. A simple moisture test kit can tell you whether the fluid has degraded past a safe threshold, and if it has, a flush is warranted. After the flush, refill with fresh fluid that matches the car’s spec, and keep an eye on the system for any signs of leaks or deteriorating lines. This isn’t optional luxury maintenance; it’s a safety-critical task that protects you and anyone sharing the road with you.
Coolant, or antifreeze, completes the trio of essential fluids alongside oil and brake fluid. Coolant not only regulates temperature but also guards against corrosion inside the cooling system. Over time, coolant chemistry can drift, and protective properties fade, leaving the engine vulnerable to overheating in hot weather or freezing damage in cold. A prudent replacement interval is typically every two to three years or around 40,000 kilometers, but always verify against the manufacturer’s manual. Before adding new coolant, perform a thorough flush to clear out old coolant and any contaminants that could compromise the new mix. Mixing old and new coolant can create slippery residues and reduce protection, so a complete system flush is worth the extra effort.
Another pivotal fluid is transmission fluid. The needs here vary more widely by age and transmission type. Automated transmissions, continuously variable transmissions, and dual-clutch setups all rely on clean, correctly matched fluid to manage gear shifts smoothly and prevent excessive wear. For vehicles older than six years or with higher mileage, inspecting and, if indicated by the maintenance schedule, changing the fluid is a cautious choice. Some models benefit from a dedicated flush machine that replaces most of the old fluid rather than draining and refilling, which leaves more traces behind. If the service history is unclear, err on the side of proactive maintenance. A well-maintained transmission fluid regime pays dividends in shift quality and long-term reliability.
Power steering fluid also deserves a careful look, especially in vehicles with hydraulic power steering. Check the level and color; replace if it appears contaminated or discolored. In electric power steering systems, this step may be unnecessary, but the broader point stands: fluids in the steering and hydraulics subsystems are integral to precise handling and long-term durability. If you notice any stiffness, whining, or unusual resistance while turning, consider a fluid refresh as part of the diagnostic process rather than a standalone quick fix.
Beyond these core fluids, some ancillary fluids deserve mindful attention. Windshield washer fluid, while simple, plays a practical role in safety by maintaining visibility in adverse weather. Top it off regularly and replace the fluid if the spray pattern becomes inconsistent or the reservoir smells sour or contaminated. Although it’s not a high-cost item, keeping this reservoir healthy is part of a broader habit of routine checks that saves time and reduces stress on a long trip.
The logic behind these fluid tasks extends beyond the mechanics. A used vehicle often carries the imprint of a previous owner’s maintenance habits. Replacing the fluids establishes accountability for the car’s current health. It also creates a clean slate for diagnosing other issues that might appear down the road. When you approach these tasks, do so with a plan rather than a scattering of repairs. Start with the fluids that directly influence engine longevity and safety, then build toward the more complex decisions about transmission health, steering feel, and cooling capacity. This orderly approach helps you manage costs while avoiding surprise failures on the road.
A practical mindset for this work is to treat the maintenance schedule as a living document tied to the car’s real-world usage. Record the dates, mileages, and the conditions under which you performed each fluid service. If the vehicle was previously used in extreme heat or cold, or if it logged heavy towing or stop-and-go driving, you may want to adjust the replacement intervals accordingly. This is not about chasing every possible issue but about reducing the odds of a hidden failure at the worst possible moment. In many cases, you will gain the most value by aligning your actions with two simple questions: Is this fluid within its expected service window according to the manual? And does the fluid show signs of degradation or contamination that demand attention now?
To keep this process anchored to a broader understanding of vehicle maintenance, consider using resources that frame maintenance in practical terms rather than in abstract theory. A useful touchstone is the general definition of vehicle maintenance, which helps you see how fluid care fits into the larger picture of reliability and safety. For a concise overview, you can explore that resource here: What is vehicle maintenance?. This reference helps you connect the fluid-focused steps outlined here with the ongoing rhythm of care that keeps a used car dependable.
As you complete these fluid tasks, you should also perform a broader diagnostic check to surface hidden issues that might not be visible on the surface. An OBD-II scan can reveal stored fault codes, including sensors that may be misreporting or systems that could be drifting toward failure even if the dashboard light remains off. This proactive scan fits naturally after you have reset the fluid baseline because it sharpens your understanding of the car’s current health and helps you prioritize the next steps in maintenance. It’s a step that protects your investment by catching problems at their earliest, most affordable stage rather than after a breakdown occurs.
The cadence of these activities is not about rushing through a list but about establishing a sustainable routine. In the first few weeks after purchase, you’ll want to watch for leaks, unusual smells, or noises that accompany fluid changes, as these can signal that the car’s seals, hoses, or gaskets are aging or failing. If a leak appears, or you observe consistent top-offs beyond a routine interval, it’s wise to seek a professional opinion before proceeding with further fluid work. The aim is to balance diligence with practicality, ensuring you don’t overinvest in preventive tasks that the vehicle doesn’t require yet, while still catching issues early enough to avoid costly repairs.
In terms of scope, the message is clear: replace key fluids thoughtfully, observe how the car responds after each change, and use your growing knowledge of the vehicle’s behavior to guide subsequent decisions. A well-executed fluids plan is not merely a maintenance routine; it’s a declaration of responsible ownership. It signals that you respect the car’s history, you understand its needs, and you’re committed to preserving safety, performance, and value. That commitment pays off every time you turn the key and feel the engine respond with steady confidence rather than hesitation or noise.
For readers seeking a broader, practical frame that ties fluid maintenance into the car’s overall upkeep, considering the general maintenance perspective can be helpful. This resource articulates how fluid care fits with other routine tasks, reinforcing that preventive maintenance is a cohesive system rather than a series of isolated chores. To read more about this broader view, you can visit the linked resource above and reflect on how fluid health supports every other subsystem you’ll service in the months ahead. And remember, while fluid replacements are essential, they are most effective when paired with a clear understanding of the manufacturer’s maintenance schedule and the vehicle’s service history. When in doubt, consult the vehicle’s manual or a trusted professional who can interpret the exact requirements for your specific make and model.
Finally, as you complete these steps and plan the road ahead, consider how this approach aligns with your long-term goals for the car. If resale value is a concern, maintaining a transparent record of fluid replacements and diagnostic scans can be a powerful differentiator. If daily reliability is your priority, a careful, prioritized fluid plan minimizes the risk of breakdowns during busy weeks or long trips. The journey from purchase to peace of mind begins with a single, well-timed maintenance act—a deliberate replacement of the car’s lifeblood—and extends through the next hundred thousand miles with consistent, thoughtful care.
External resource: For a comprehensive, buyer-friendly checklist that complements the fluid-focused guidance here, see the Used Car Maintenance Checklist at Autocar. https://www.autocar.co.uk/car-buying/advice/used-car-maintenance-checklist
null
null
The Quiet Gatekeepers: A Practical Electrical and Safety Systems Check for a Recently Purchased Used Vehicle
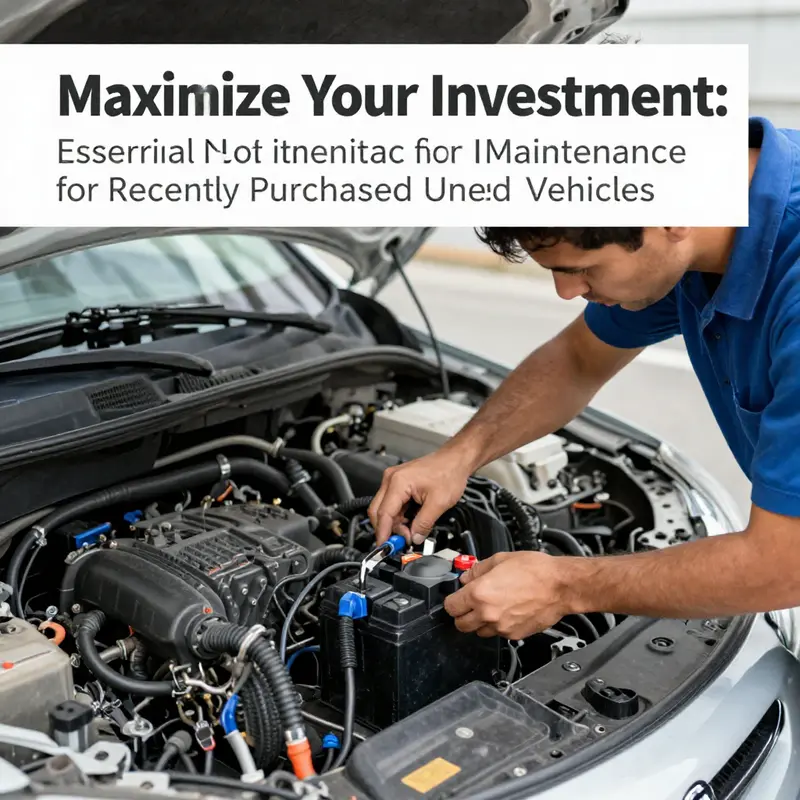
After you bring a used vehicle home, the visible checks for tires, fluids, and brakes are important, but the electrical and safety systems are the true gatekeepers of reliability. This chapter outlines a practical checklist to assess health and avoid surprises. Start with the battery and charging system. A healthy battery should read about 12.6 volts with the engine off. With the engine running, 13.5 to 14.5 volts indicates the alternator is delivering power. If the voltage is outside this range or drops under load, the alternator, belt, or a parasitic drain may be faulty. Inspect battery terminals for corrosion, tight clamps, and damaged insulation.
Next, examine wiring and connectors. Look for frayed insulation, exposed copper, or signs of overheating. Note aftermarket wiring or nonstandard splices, as these can be safety risks or diagnostic obstacles. Check fuses and relays for signs of corrosion or looseness.
The lighting system should be tested comprehensively, including headlights, turn signals, brake lights, and interior illumination. Dimming or flickering lights can indicate grounding problems, worn bulbs, or wiring faults. Don’t forget the wipers and horn as basic indicators of wiring health and control reliability.
Electrical accessories such as HVAC climate control, infotainment, power windows, and mirrors should operate smoothly without delays or binding. Unresponsive controls or erratic behavior can signal aging control modules or power supply issues. Run a quick vehicle system scan if an OBD II reader is available. Note any stored or pending trouble codes and consider context like temperature and operating conditions.
During a short road test, observe how electrical subsystems behave under load. Check the HVAC performance, infotainment power draw, and sensor behavior during braking or cornering. Abnormalities deserve professional diagnostic follow up.
The safety systems deserve careful verification. ABS and ESC should engage as designed, and airbags indicator should show ready on startup. If warning lights persist or you smell burning or hear unusual noises when braking, treat it as a red flag. A controlled test of braking behavior, steering feel, and stability control helps confirm readiness for daily driving.
Finally, document anything unusual and revisit the checks after any electrical work, battery replacement, or software updates. Establish a simple, repeatable baseline that you can reference over time. Rely on official maintenance schedules from the vehicle manufacturer to guide service intervals and testing procedures, and use them to plan proactive checks rather than reactive repairs.
Polished Protection: Interior and Exterior Care for a Recently Purchased Used Vehicle

Buying a used car is an exciting step, but it also places you in a window of opportunity. The vehicle you’ve acquired comes with a history that you can read in its wear and in its neglected corners. The most practical way to honor that purchase is to approach interior and exterior care as a cohesive ritual rather than a scattershot set of chores. A thoughtful, consistent routine not only keeps the car looking fresh but also helps preserve its value and reliability in the long run. This chapter explores how to approach exterior and interior care as a seamless narrative of protection and renewal, a narrative that fits neatly alongside the broader maintenance theme of keeping a used vehicle dependable after the purchase moment has passed.
The exterior deserves attention not merely for appearances but for the way environmental exposure steadily wears at a finish and at trim. UV rays, bird droppings, tree sap, and road grime all take a toll, breaking down clear coats and dulling colors over time. The goal is not to chase a showroom look indefinitely but to establish a durable, repeatable routine that shields the surface while enhancing its natural depth and clarity. Begin with a careful wash that removes the bulk of contaminants without inflicting micro-scratches. A two-bucket method—one for soapy solution, one for rinsing—helps reduce the chance of dragging embedded grime across the paint. A clay bar or decontamination mitt can be employed after washing to lift embedded fallout that soap alone cannot remove. This step matters because it paves the way for any protection you apply to truly bond with the surface.
Protection choices fall along a natural spectrum: all-in-one protectants, waxes, and sealants, each with its own advantages and timing. An everyday, easy-to-apply all-in-one product can provide a convenient, initial layer of protection that also enhances the surface’s feel, without requiring a high level of expertise or equipment. For drivers who want longer-term defense or a more pronounced gloss, a wax or a synthetic sealant offers deeper bonding and improved resistance to the elements. Waxes, with their traditional lustrous look, typically deliver a warm, glassy finish and are known for their UV resistance and repellent quality against water. Sealants, on the other hand, form a hard, hydrophobic barrier that tends to last longer and resist chemical washes better than conventional waxes. When the vehicle’s paint is in good overall condition, a carefully chosen wax can bring out color depth and clarity, especially on darker hues. If the paint has micro-marring or you desire a maintenance-friendly option that stands up to frequent washing, a synthetic sealant can be the smarter bet. Either path should be chosen with an eye toward the vehicle’s use, climate, and how often you expect to wash in the coming months.
Durability is a practical lens through which to view exterior care. A common approach is to apply a protective layer after the initial wash and decontamination, then reapply on a schedule aligned with exposure and personal preference. In sunnier, dustier environments, you may find yourself reapplying every few weeks to maintain that fresh look and the water-shedding properties. In milder conditions, six to twelve months between more intensive protection sessions can be reasonable, particularly if you are using a high-quality sealant. The key is to observe how the surface responds to washing and to adjust the cadence accordingly. A protective layer also helps when you park near busy roads or under trees, offering an extra measure against sap and fallout. In addition to protection, consider trim and high-contact areas. Faded plastic or rubber trims benefit from compatible restorers that revive color and suppleness without creating a greasy or slippery surface. Restoring these accents can dramatically improve the overall perception of the car’s condition, especially when you plan to resell or trade in the future. The exterior story is not complete without noting the wheels and tires, which contribute to the aesthetics and safety of the vehicle. A thorough exterior routine includes inspecting tire tread depth, pressure, and sidewall condition; replacing any aged tires according to the manufacturer’s guidance; and ensuring wheels are clean and free of embedded brake dust that can corrode finishes over time. A clean wheel well makes the overall exterior presentation more compelling while reducing the chances of stone chips and corrosion over the longer term.
Inside the cabin, the care regimen mirrors the exterior in its deliberate, steady rhythm. The interior surfaces—plastic, vinyl, leather, fabric, and rubber—are living materials that respond to sunlight, humidity, and use. A successful interior care approach begins with a clean slate: removing debris, vacuuming, and addressing odors without harsh solvents that might damage sensitive materials. Microfiber cloths and pH-neutral cleaners are particularly effective because they lift dust and oils without altering the surface chemistry. For dashboards, door panels, and trim, a conditioning product can replace lost oils and keep plastics from drying and cracking. The goal is not to coat everything with an artificial sheen but to maintain a balanced, clean, and comfortable environment. Leather, if present, requires more nuanced handling. A leather conditioner can restore softness and prevent cracking, but it should be applied sparingly and allowed to absorb fully before any topcoat of protection or protection-enhanced finish is added. For fabric seats, steam cleaning or light extraction can remove embedded odors and stains, followed by a fabric-safe protector that helps repel spills while preserving the material’s texture and color. In every interior step, the emphasis is on maintaining tactile comfort and visual appeal while safeguarding the cabin from the kind of wear that often accelerates depreciation.
Beyond the direct care steps, there is a broader maintenance discipline that makes interior and exterior care more effective. The same mindset that motivates regular engine oil changes and brake inspections also underpins a thoughtful exterior and interior care routine. A clean, well-protected exterior reduces the chance of oxidation and rust, while a refreshed interior maintains cabin comfort and long-term material integrity. The practical benefit is clear: a well-kept car is easier to maintain mechanically because attention to joints, seals, and trims helps prevent moisture intrusion and chemical damage that could otherwise find its way into the mechanical systems through micro-leaks and dust ingress. In this sense, interior and exterior care becomes part of a holistic approach to vehicle health, reinforcing the idea that maintenance is not just a function of time or mileage but a conscientious habit that pays off in reliability and resale value.
A useful way to ground this care in action is to connect it with the broader concept of vehicle maintenance that guides decisions across systems. Understanding the purpose and scope of maintenance—what to do, why it matters, and when to act—offers a framework that makes the interior and exterior care feel purposeful rather than decorative. For readers exploring this approach, a concise overview of vehicle maintenance provides context for how these cosmetic and protective steps interact with mechanical upkeep. What is vehicle maintenance.
The rhythm of care you establish after purchase should align with your local climate, driving patterns, and storage conditions. If you park indoors and wash regularly, you may extend the life of protective films and trim, and you may be able to stretch the intervals between more intensive protection applications. If you face harsh sun, salt, or seasonal road treatments, the exterior will demand a more active schedule. Likewise, interior care must adapt to occupancy, pets, or any ventilation needs. The goal is to respond rather than to overreact. A thoughtful, measured cadence keeps the car attractive, preserves its materials, and reduces the likelihood of expensive repairs triggered by neglect. In practice, the routine might look like this: after purchase, schedule a comprehensive exterior decontamination and a first protective layer; within the first month, renew interior surfaces with conditioning and a light, interior-safe cleaner; then establish a quarterly or semiannual plan for reapplying protection, depending on exposure and product choice. The exact cadence matters less than the consistency and the willingness to observe and adjust based on the vehicle’s performance in daily life.
Ultimately, interior and exterior care should be seen as an extension of the care you give the car’s broader maintenance plan. An external coat of protection helps the paint resist the minor assaults of the road, while a well-maintained interior creates a healthier, more comfortable space that invites responsible driving and careful ownership. The approach also supports resale value, a practical consideration for many buyers of used vehicles. The most important takeaway is that the care you apply reflects a respectful, proactive stance toward the vehicle’s life story. Each wash, each wipe, each application of protection, builds a narrative of stewardship that can prove valuable when you decide to part with the car or pass it on to another owner. The car’s condition after purchase does not have to remain static. With a clear plan, attentive observation, and consistent application, you can transform a used vehicle with a modest past into a well-preserved asset with a future.
To close this thread of care, it is worth noting that the exterior and interior routines should not be isolated from other maintenance tasks. A successful approach treats cleaning and protection as a complementary process to checking fluids, inspecting tires, and diagnosing electrical systems. The more you see maintenance as an interconnected practice, the more you can anticipate potential issues before they become costly repairs. The chapter you’ve read here is designed to fit naturally with the practical, up-front steps of fluids and components covered earlier and to set the stage for the more specialized checks that follow. By investing time in a steady interior and exterior care routine, you not only elevate daily driving comfort but also safeguard the car’s value and longevity across miles of future journeys.
Internal link note: this approach aligns with the broader maintenance mindset described here: What is vehicle maintenance.
External reference: for a representative example of an exterior protectant product page that illustrates common coverage, you can review the following resource to understand how protectants are described in consumer guidance. https://www.flamingoshine.com/products/shine-protect
Final thoughts
Maintaining a recently purchased used vehicle is not merely an act of care; it’s a strategic business decision that can lead to enhanced reliability and cost-effectiveness over time. By addressing fluid replacements, inspecting key components, checking electrical systems, and caring for both the interior and exterior, you can effectively extend the life of your vehicle and safeguard your investment. Implement these practices diligently to ensure your vehicle remains a dependable asset to your business.